Friday, July 24, 2009

Third Brake Light Fun

This fun time mod evolved from a discussion I raised on the E39 Roadfly.com forum found here: http://bimmer.roadfly.com/bmw/forums/e39/9312074-3.html

I wanted to customize my third brake light by making and installing a blackout. Joe M suggested an elaborate LED setup. This got me thinking about these scrolling LED belt buckles and name tags you see at disco clubs and Tokyo. So, I researched it out a bit and bought one hoping it would work.


Recipe:
E39 BMW
Common handtools
Rachet set
Scrolling LED License Plate Frame

2 hours working time


The frame I bought is a Flash Frames brand. It was the cheapest and most prolific model on eBay. There is also E-Frames, Roadmaster, and other brands with different features. My model boasts 5 message @120 character storage capacity, wireless remote, and a $20 price tag- shipping included. Got it in the mail yesterday; did the project late tonight.

Let's get started...

Get your package and beautiful 8 month pregnant wife to open it -I love her.


On my model, the LED assembly just pops right out of the frame. Discard frame- it's crap.


Disassemble your car to get to the rear deck per these instructions:
http://www.m5board.com/vbulletin/m5-e39-e60-tips-tricks/92491-e39m5-rear-deck-removal-diy-long-detailed.html
Once that's done (95% of the project), getting the brake light module out is very simple. Just go into the trunk, remove the nut shown here, and slide the module back to unlock it. The module is now free.


Undoing this harness will release the module for working freedom.


I pulled out the lens (just unclipped two clips on the bottom of the module) then the parabolic reflector; but the latter ended up not being necessary.


I like to use this indoor/outdoor automotive trim tape (available at all auto parts stores and Wally World). It holds well but will come off clean when desired. I have used it on many projects, especially those which I want to remain reversible. I put it on the backside of two edges of the LED module where they contact the parabolic reflector.


All put back together.


LED module wired directly to the battery for programming.


I just smashed the leads into the harness for ease and reversibility. They are so tight, they aren't going anywhere. Brown is ground. Black/yellow is 12v + switched. The only downer of this project is that the LCM doesn't at all like the fact that I pulled the filament bulb and replaced it with a 500 ma LED module. It kept cycling on and off trying to establish resistance, so the message would start then restart and so on never getting through all the way. So, reluctantly, I have the filament bulb also in right now. I plan to get a red bulb (since my red lens is gone) and insert it behind the message board in it's normal place to give the needed resistance and backlight the LED module in a cool way. Utility AND functionality!
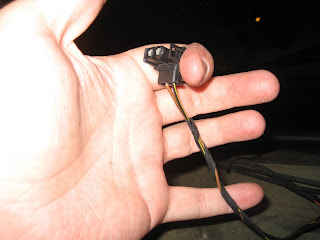

Wire path.


One cheap video to complete the write-up:


The message is programmed via a wireless IR remote control, so I'll just be changing the message through the back window... Now put your car back together and enjoy!
Wednesday, July 1, 2009

E39 Auto-unlock Mod

Here is a super easy DIY mod I did on my E39 to add auto-unlock.

I got the idea when it bothered me so much (I really don't know why) to have to pull the door handle twice to get out of my car to undo the
autolock that the management system proffers me. Either that, or hit the lock/unlock button on the center console. For some reason, both options were maddening to me. So, with the help of my friends on the E39 forum @ Roadfly.com and viewers like you, I figured this one out. Let's begin.

Working time: This mod took me 2 hours, but I would suspect it taking you the better part of an hour now that the guesswork has been removed.

Here is your automatic shifter. I haven't figured out any remedy for the manual version because, well, I don't have a manual Bimmer.


Thanks to a sweet
vid by BSW, I found this little trick out. Put your fingers in the boot on either side and pull up. It pops out quite easily. Here is the link for the 5 min BSW vid since my pics don't do the removal justice: http://www.youtube.com/watch?v=QRzdTHf3IaU
It isn't necessary to do
all of the steps they did, but it sure is nicer to have the extra space!


You can just let the boot hold the shift cover plate up while you work...


This is the heart of this mod- the
DEI 528T Pulse Timer Relay. It is available for $25 or less at numerous places online; however, I got mine on eBay for $9.70 including shipping. This module takes in a pulse (12v+ or ground) and triggers a relay that can latch on or off (NO and NC) for 1-65 seconds. I set mine to 2.5 seconds.


There are 5 wires that need hooking up. You will notice the I only address the splicing of 4 of them here. This is because I knew before the project started (Thanks to Jim Cash @
Roadfly.com ;) that the door lock/unlock switch is thrown by a ground input. So, if you look closely, I have spliced the yellow wire out of the unit into the ground (black) for the unit. The yellow wire is the common pole of the SPDT 15A relay.

I spliced the 12v+ and ground wires (Red and Black) into the cigarette lighter outlet leads.
That'll give plenty of juice at a convenient location. I like splicers for this kind of project because they are reversible (sort of) and I don't have to solder in such a delicate area, though solder and shrink tubing is superior and should be used whenever possible.


Next I spliced
the relay output wire (brown) into the lock/unlock trigger (yellow/red striped wire) coming out of the lock/unlock switch. Again, you can see how to access this from the BSW video above.


This next part is what took me the longest. I had to find an adequate ground trigger for the 528T trigger (black/white striped wire). After 45 min or more poking around with a digital multimeter, I found this little beauty: there is a ribbon cable coming out of the shift position sensor to the right of the shifter. This sensor sends ground signals that activate each light on the shift cover plate. I found that the 3rd wire in from the rear side of the ribbon sends a ground signal to activate the reverse light on the shift cover plate. I spliced the pulse relay trigger (black/white striped) into this one. I chose the reverse position so that when I shift from drive or even neutral up through reverse to park, the pulse relay would be triggered and I would be free from my car!


Tucking the wires away. Take care that they don't get pinched by the pivoting shifter at any time or you might have a spark and fire beneath your armrest!


The unit fits just barely here.


And you are ready to roll- able to spring free from your leather covered prison at a moment's notice.